Galaxy

Galaxy

About Us

Welcome to Lynn & Robb's BLOG. This is an account of our experiments in dying fabric mostly.

More About Us

Lynn's background includes working with handicapped kids, teaching sewing, quilting for over 50 years and learning the name and location of every country in the world (still working on the capitals).
Robb, my muse and cohort, specializes in photography, graphic design, and rolling sushi.
We dedicate this BLOG to grandson Keenan, who needed to earn a textile badge for Scouts.

Friday, November 11, 2011

Dyers have a Secret. It's not one they willingly  share, but occasionally one may airily make a statement such as; "after a few tries you'll get the results you want..." BUT the Rest of the Story is, one dip won't do it.  The REAL Secret  is, this is a trial-and-error craft. Robb may get a masterpiece on the first try---but not me. Tie dyers do  their magic ONCE and that's it. But there are the 'dismals' that even Robb can't  salvage.
I find them at the bottom of bags now and again.
This  rant is now appearing in print because of a pair of pillowcases. Marge asked for some to go with her Southwest Room. Four colors;
*sand dune
*charcoal
*Turkey red
*russet
with white lines between.  O-------kay. Pillowcases are kindergarten sewing. No prob.
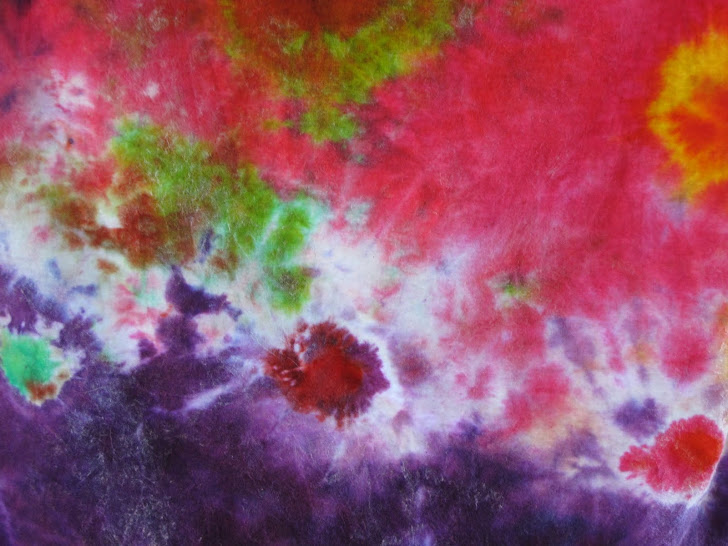
Measured the fabric, measured the size. measured where to leave white spaces. Did not check the grain of the fabric. The photo shows the results.

If I had straightened the seam, the stripes would have been off (not matched up)

I don't mind that the dye looks like 'magic markers' or  that the baby-rice-cereal resist didn't work.  It still looks artsy. But that off-grain seam really STEAMS me.


Okay Marge, I'm sending these off to you, but what I'd really like is for you to come back next   summer and give me a second chance. Now that I've learned the Secret.

Tuesday, November 1, 2011

hello out there to all our followers! It has been a while since we posted any new adventures but today is the day. Hope you all had a great halloween! I have been in the bay area for about a month now so the tye dye has kinda slowed a bit...My nephew keenan had a birthday party this month and he decided that he wanted a party at a local amusement park for the halloween haunt....followed by a day at their robotics meet. We decided it would be cool to outfit the boys with some cool shirts...since their colors for their robotics team is black and orange...it seemed fitting to use the color scheme for their shirts.


 I figured that these shirts would be a multifunctional thing...they could use them for halloween, or they could use them for their robotics team...or when baseball starts up again..they have cool Giants colored shirts!

Monday, October 17, 2011

hey there ....its Robb again.....thought I would post some new pics

first...I have been away from our little tye dye lab for almost 2 weeks and was having dye withdrawal...so I went to a large craft chain store and purchased a tye dye kit. Now I guess i have been spoiled by having the procion dyes because these dyes were not the same


 I am not knocking these dyes for a quick job they are fine but seem to really fade a lot


as you can see the colors are not as vivid.....so as we go through this process ...we learn that not all shirts are destined for greatness....we live to dye another day!


On a brighter note....as I send my tye dye masterpieces out into the universe it is always nice to see that they found a happy home....

here are just a few pics of the happy recipients....


thanks for the pics...and stay tuned!

Tuesday, October 11, 2011

Robb's been having too much fun with this, it's my turn.  Want to demonstrate a technique we tried called ruching. (from Hand Dyed Fabric Made Easy by Adriene Buffington) We used bandana squares treated with soda ash.

-Lay damp fabric flat with a string across one end and roll up into a tube.


-Turn the roll into a donut (magic trick) and tie the ends together slightly gathering the fabric. (this is the ruching process)


-Place 'donut' in a bowl and drizzle dye on one side.


-Turn over and drizzle another color.

-Put in plastic bag and let cure for a few hours.

-Untie and unroll and rinse. Wash with Synthropol as you would a t-shirt.

Note our screen door over the wheelbarrow. It is great for rinsing out dye.

Sunday, October 9, 2011

hello again .... its your dye hard maniacs!!  today we are showing a few new shirts that we did....we are still trying different techniques and patterns...its kinda cool to see what we come up with...everytime we untie a shirt or piece of fabric its like unveiling a new painting
This is a new technique that we tried out...we had a request for a shirt that looks like fireworks....so this is our first attempt (Lynn's First awesome shirt) i am including a pic of both sides of the shirt....this technique was done by tying several different circles...the trick is when you tie the shirt you actually use marbles! the next time we do one of these we will show the process...but all in all a great new design!
This next shirt is a special request shirt. i have a good friend who is a dye- hard Oregon Beavers fan and i wanted to make sure that she had a cool shirt to wear to the tail-gate party and game...so this is what i came up with...wear it with pride Shelly B!

So of course now that it is football season it only seemed appropriate to do some fan tye dye gear. The shirts here are for the younger Miami Dolphin fans
and of course they look even better when modeled by the boys!
well thats all i got for today ...hope that y'all enjoyed our latest adventures in dyeing!

Tuesday, October 4, 2011

Just a quick note and pictures of the latest shirts....

 Figured out how to do a fantastic dual colored spin shirt with yucca and burgundy dyes

and another pre screened paradise shirt with a custom mixed cobalt, turquoise dye

Monday, October 3, 2011

Well Hello out there all you Dye hards!!   it is I .... the guy with the blue fingers!! (a small price to pay in the name of art) Havent had much time to take pictures and post blogs lately but you know what they say....there is a time to live and a time to dye... so here are a few more examples of various techniques from the past few dye sessions

The first few shirts started out as colored shirts
This shirt started out as a persimmon colored ladies shirt
I did three separate spins then bunched the remaining material and rubberbanded..then we added brazil nut, plum and a rust brown/orange 
 This shirt started out as a navy blue shirt...now instead of dye I used a bleach technique here. I did a very tight spin and then tightly banded before spraying with a 50/50 mix of bleach and water. After applying bleach I let it sit for about 15 minutes then immersed in a gallon of water with about a cup of white vinegar and let sit for about a half hour before opening and rinsing the shirt
Another example of a spin shirt with turquoise and cobalt blue

This shirt is where I experimented with a new technique...i just did a couple of random spins then bunched ther rest of the shirt and heavily and tightly rubberbanded....I added yucca camel and brazil nut dyes and came up with this very cool spin and marble pattern combination
After doing the previous shirt i decided to try taking the shirt and doing two separate spins...one on the upper left and one on the lower right...these were very tight spins and it shows with much more definition .....tightly rubberbanded....I added cobalt blue and yucca dyes to this shirt 

....stay tuned ....you know you are dyeing for more!!