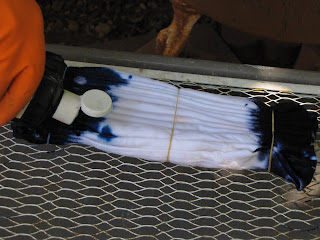
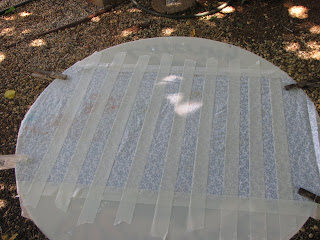
Galaxy

Galaxy

About Us

Welcome to Lynn & Robb's BLOG. This is an account of our experiments in dying fabric mostly.

More About Us

Lynn's background includes working with handicapped kids, teaching sewing, quilting for over 50 years and learning the name and location of every country in the world (still working on the capitals).
Robb, my muse and cohort, specializes in photography, graphic design, and rolling sushi.
We dedicate this BLOG to grandson Keenan, who needed to earn a textile badge for Scouts.

Wednesday, September 28, 2011

We interrupt this blogcast to bring you special programming. A unique inside look into
FLOWER POUNDING       This is an old craft that has been demostrated at the Paradise Museum Days of Living History. This is where mostly senior citizens get to dress up as pioneers and show off the Good Old Days. Flower pounding, a craft once used by Indians shows one way to use natural (but unfortunatly not colorfast) dyes.
It also gives the kids a chance to hammer something.  This sparks the interest of boys, who normally would pass up a booth involving flowers.
Equipment needed:
Squares of cotton fabric
masking tape
hammers
a pounding surface  (we use plastic cutting boards)
scissors
flowers, flowers, flowers and leaves
Purists treat the fabric with alum and washing soda. However Dharma says that process deteriorates the fabric, so I just wash the muslin with detergent and 2 Tbsp.
washing soda to remove the sizing, and don't worry about making this a work of art. 
It's just a fun thing for kids to do.
Start with ironed fabric squares.  Have a variety of flower petals to work with and place the petals on the fabric to make a design.

Work from the center outward. When you have a pleasing pattern, cover the flowers with masking tape. Using a few petals at a time work best, you can always add more.  A whole flower taped down will come out a mushy blob
 left: leaves taped         right: flower taped with center cut out
Next, take your taped square to the pounding board, turn the whole thing over and start pounding.  You will see the pigment bleed through. Keep pounding (not too hard!) untill your design has all come through.Then remove the tape. Now you can add more stuff if you like. Use a dry iron to set the colors, the complete project looks cute displayed in an embroidery hoop.
finished design

some sample flowers
Complete instruction can be found in the book Flower Pounding by Ann Frischkorn and Amy Sandrin


Tuesday, September 27, 2011

So it has been a while since i posted pics of the newest shirts produced....so here are some of the newest creations!!
a few different techniques....a few pre screenprinted shirts from paradise...


all different sizes from little kids through ladies

and all of these shirts started out as all white
so Todays word is OATMEAL....ya thats right the breakfast favorite is now a cool dyeing accesory!

these are napkins that we got from Dharma...as you can see you just spread the oatmeal out on the fabric...and let dry in the sun...caution: may attract flies....might not want to use butter and brown sugar on this oatmeal!!

This was a kind of try and see technique in this particular phase we took dye sprayed it on and then Cousin Marge and her lovely yellow gloves did a bit of arranging of the oats! 


as you can see its lots of icky dirty breakfast fun!
after all the manipulating of the oats we let them all sit and cure
then we hung them to dry in the sun before rinsing out and machine washing
for fun I figured what the heck ....lets try it with a shirt

after applying the oatmeal allover the shirt I took it and sprayed it with a couple different colors of dye and then let the whole thing dry in the sun....what an icky mess!

actually the shirt came out kinda cool after all....imagine that!!....all from a bowl of oatmeal!

Tuesday, September 6, 2011

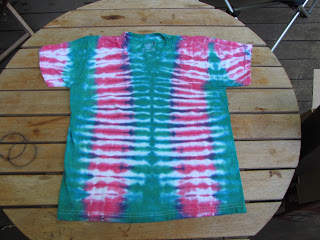
All new vertical fold and first attempt at spider pattern

Hello again from Robb the Tye Dye Guy!!

Today I tried a few different techniques...although we have done a few vertical fold shirts this particular one I seem to have the technique perfected.


I used Cobalt Blue followed by Alpine Blue and then filled in the middle with Plum
This shirt came out quite nice with an almost neon electric look to it

I also tried a new techinique which is supposed to leave a spider pattern. However I need to get a different bottle with a very fine tip to do this technique.


It came out kinda cool but we will have to work on the process a bit more

Socks & Stripes Day 2

Robb dyed a pair of socks today. Swore he'd never wear them but they are cheerful.


(note: the socks came out quite bright but actually show up better if you turn it inside out as shown here)
I tried stripes using masking tape for a resist.  

Thought the dye, which was brushed on, might bleed through----it did.
Mixed some dye with Knox gelatin and brushed that on.  That did not bleed, but I could not wash it out, and it did not soak out either.
 Just hung it on the line to dry, but the colors came out weak.  Shoulda (you will see that word a lot) bagged it to cure.

We also went to K-Mart and bought a whole shopping cart full of $3 cotton t-shirts.  Later I found Big Lots had them for less.......

a note from robb

Well hello out there to all that have found their way to our blog...I myself am just learning the process of posting and inserting stuff into the blog so I thought I would take this time to try and post a few thoughts and pics of some more of our venture into extreme tye dye The shirt above was done with an accordion fold. This particular shirt is more on the dark side and a little more subtle than some of the others that I have done lately

Thursday, September 1, 2011

We Start with Tie Dye - Day 1

After talking about dying fabric for several years, we took inventory and found we had all the materials we needed. A mild summer encouraged us further so we went T-shirt hunting and got everything. So, here we are, recording our experiences and experiments. We hope our journey helps you on your own!

Today we got serious and mixed our first batch of COLORS!
We started with
Fiber Reactive "Proclon MX type' dyes we purchased from Dharma
http://www.dharmatrading.com/
Golden Yellow
Rose Red
Burgundy
Turquoise
Chocolate Brown
Cayman Island Green
Alpine Blue
We mixed  2 tablespoons of dye to a cup of water, but found out later that was too strong.  It was suggested we cut back to 1T dye or less (2 teaspoons) per cup of water, which we did and found it worked just as well.

We tried to concoct a lime mixing 1-1/2 T Golden Yellow to 1 tsp. Alpine Blue to 1 cup water. It came out apple green.
We soaked our cottons in a  solution of 1 cup Soda Ash  mixed with one gallon of warm water and let it sit for about 2 hours. This is what Dharma calls the Soda-Soak Tie-Dye Method. (Use precautions when using soda ash (gloves, protective eye wear)).
Using gloves we wrung them out and hung them on the clothesline to dry. They can also be dyed wet.
We did not dump the soda ash solution (it's not eco-friendly) but continued to use it until it was gone. The mixed dyes were put in squeeze bottles. The narrow tip bottles work best.

Robb dyed 3 shirts today.

One tight spiral,

a horizontal fan fold

and a vertical fan fold that we found directions for on Jeremy's Tie-Dye page.http://tiedyeguide.com/tiedye/HowToTie-dye.html (See pictures).

After dying, the shirts sat in plastic bags for 4 hours in the warm California sun. We rinsed them with a hose and bucket 4 or 5 times, hung them on the clothesline until dry. Then we washed them with warm water in washing machine and Synthropol and a Shout color-catcher sheet and tossed them in the dryer. They remain color-fast (he's worn them already).

I experimented with cotton bandannas (Dharma sells them by the dozen 22"x22" already hemmed). Also made a sampler. The color proportions are recorded.